


- by HOVSCO Official
How to Replace a Derailleur Hanger: A Step-by-Step Guide for 2025
- by HOVSCO Official
Replacing a derailleur hanger is a crucial bike maintenance task that ensures smooth shifting and protects your frame from damage. The derailleur hanger connects the rear derailleur to the bike frame and is designed to bend or break under impact, acting as a sacrificial part. Knowing how to identify, remove, and install a new hanger can save you costly repairs and keep your bike performing at its best.
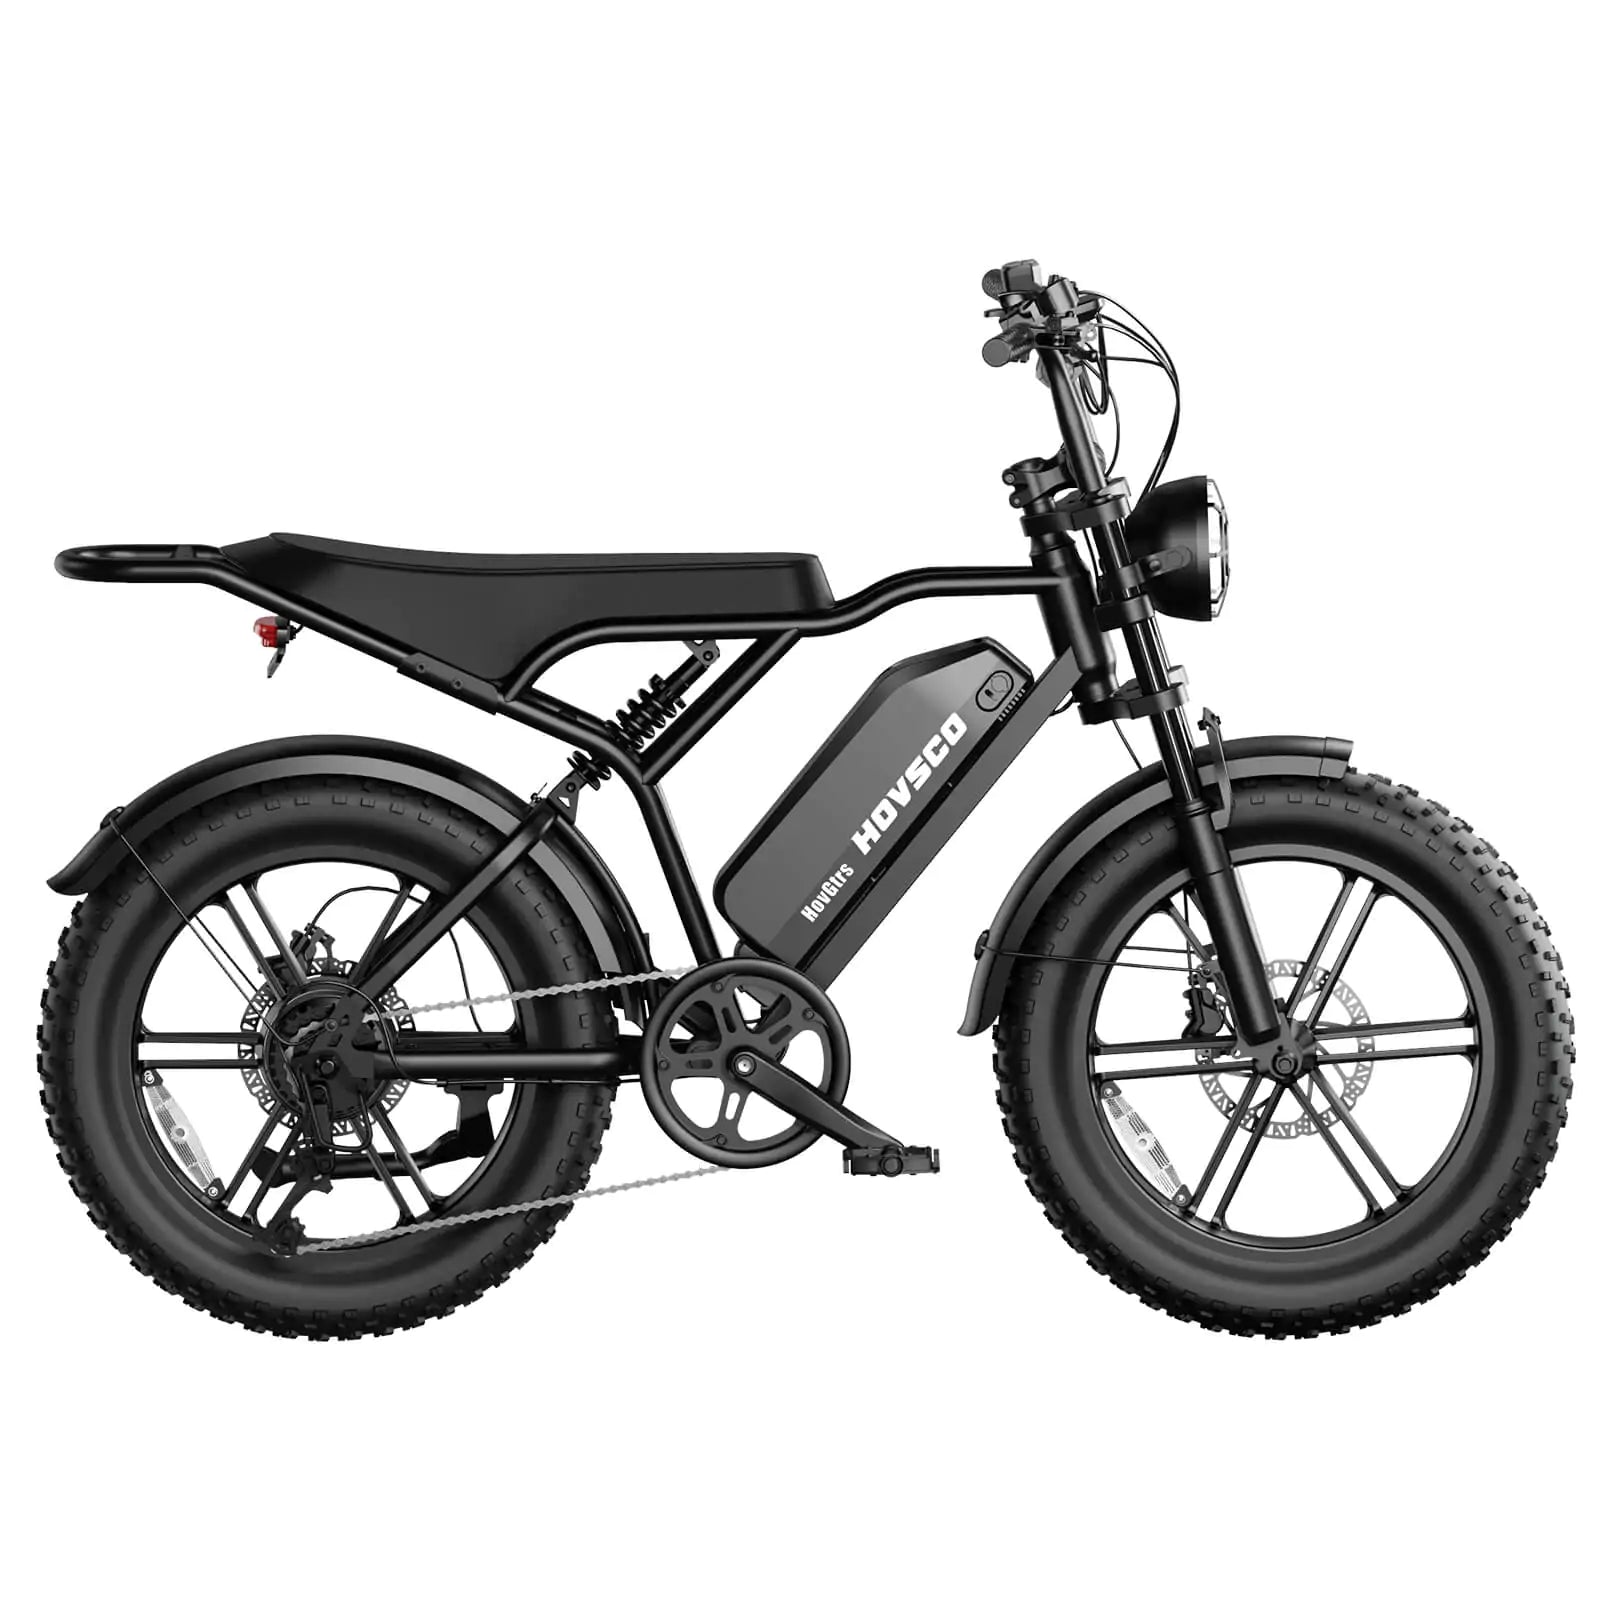
A derailleur hanger is a small, replaceable metal piece that attaches the rear derailleur to the bike frame. It absorbs impacts that would otherwise damage the frame or derailleur. Over time or due to crashes, hangers can bend or break, causing poor shifting or chain issues. Replacing a damaged hanger restores proper alignment and drivetrain function.
Signs of a bent hanger include difficulty shifting gears, chain skipping, or the derailleur rubbing against the cassette. Visually, the hanger may appear crooked or misaligned. Using a derailleur hanger alignment gauge can precisely measure bends. If the hanger is cracked or broken, replacement is necessary. What Makes HOVSCO Electric Mountain Bikes Durable?
Common tools include a set of hex wrenches (Allen keys), a torque wrench, bike cleaner, and grease. Optional but helpful tools are a derailleur hanger alignment gauge and threadlocker. Replacement hangers vary by bike model, so identifying the correct part is essential before starting.
Derailleur hangers are bike-specific with thousands of designs and little interchangeability. Using the wrong hanger can cause improper fit and shifting problems. To find the correct hanger, note your bike’s brand, model, and year, and use online databases like derailleurhanger.com or consult your bike manufacturer or retailer.
Begin by shifting the derailleur to the smallest cog, then remove the rear wheel for easier access. Use a hex wrench to loosen the bolt connecting the derailleur to the hanger and let the derailleur hang from the cable. Unscrew the damaged hanger from the frame dropouts carefully, keeping track of bolts and orientation.
Before installation, clean the dropout area and apply bike grease to the mating surfaces and threads. Align the new hanger with the frame’s dropout and secure it with bolts, using threadlocker if recommended. Reattach the derailleur, tightening the mounting bolt to manufacturer torque specifications. Reinstall the rear wheel and check shifting.
Yes, even new hangers may require fine alignment. Using a derailleur hanger alignment gauge, gently bend the hanger to ensure it is perfectly straight relative to the wheel. Proper alignment prevents shifting issues and chain drops, ensuring smooth drivetrain operation.
Derailleur Hanger Replacement Process Chart
| Step | Action | Tools Needed |
|---|---|---|
| Identification | Check for bent or broken hanger | Visual check, alignment gauge |
| Removal | Remove rear wheel and derailleur | Hex wrenches |
| Cleaning | Clean dropout and threads | Bike cleaner, rag |
| Installation | Attach new hanger with bolts | Hex wrenches, threadlocker |
| Reassembly | Reattach derailleur and wheel | Hex wrenches, torque wrench |
| Alignment | Adjust hanger straightness | Alignment gauge |
When replacing a derailleur hanger, always buy from reputable sources like HOVSCO or specialized suppliers to ensure compatibility and quality. Keep a spare hanger on hand, especially if you ride frequently or off-road. Invest in basic tools like hex wrenches and alignment gauges for DIY maintenance. Proper installation and alignment maximize your bike’s performance and longevity.
“At HOVSCO, we emphasize the importance of derailleur hanger maintenance for safe and smooth riding,” says a HOVSCO bike mechanic. “Replacing and aligning the hanger correctly protects your frame and drivetrain. We recommend riders familiarize themselves with this straightforward repair or seek professional help to avoid costly damage.”
Q: How do I know if my derailleur hanger needs replacement?
A: If shifting is poor, the derailleur rubs the cassette, or the hanger looks bent or cracked.
Q: Can I ride with a bent derailleur hanger?
A: It’s risky; bent hangers cause shifting problems and can damage the drivetrain.
Q: Are all derailleur hangers interchangeable?
A: No, hangers are bike-specific; always get the exact match for your model.
Q: How much does a derailleur hanger cost?
A: Prices vary but typically range from $15 to $50 depending on brand and model.
Q: Can I replace the derailleur hanger myself?
A: Yes, with basic tools and careful attention, it’s a manageable DIY task.
To repair a derailleur hanger, first, remove the rear wheel and derailleur. Check for damage to the hanger. If bent or broken, replace it by unscrewing the old hanger and attaching the new one. Ensure it's properly aligned to prevent shifting issues.
Although replacing a derailleur hanger is not difficult, it must be carried out correctly to have the smooth shifting you anticipate from your derailleur.
Furthermore, in many circumstances, a broken derailleur hanger indicates a problem with the transmission, such as a bent or incorrectly fitted rear derailleur, a damaged or too short-chain, etc. New hangers can breakfast if they are not checked and fixed promptly after installation.
Whenever possible, leave your ebike in the hands of a competent technician. If not, be sure you follow the guidelines listed below.
The tools:
You will only need a few tools to complete the installation of a derailleur hanger. You will need the following materials:
In addition, the following items are required for the installation of the chain and the adjustment of the derailleur:
Before replacing the derailleur hanger, gather the necessary tools: a wrench, replacement hanger, and possibly a torque wrench. Make sure the area is clean, and ensure the hanger is removable without damaging the frame or derailleur.
The derailleur hanger is often damaged due to a collision with the derailleur or another object. However, be sure that none of the other critical components of your ebike has been damaged. Before proceeding, check for damage to the frame, derailleur, chain, shifter cable, and rear wheel. If you find any, repair it before continuing.
Carefully remove any residual components of the old derailleur hanger from the derailleur hanger. Remove the back wheel to allow easier access to the derailleur hanger, and then remove the derailleur from the hanger using a hex or Torx key, depending on the kind of derailleur you have. It is necessary to use a minor hex key to remove the derailleur hanger from the frame; in my instance, this is a 4mm hex key. Take care not to damage the frame, and clean the derailleur hanger mount when you're through.
To install the new derailleur system, attach the derailleur hanger to the frame. Then, carefully reassemble the derailleur, ensuring it's securely mounted and aligned. Adjust the derailleur to ensure smooth shifting once everything is reassembled.
Take your new derailleur hanger and apply some Loctite to the threads of the screws since you won't be able to properly tighten the screws in the aluminium derailleur hanger unless you use a torque wrench. Then, with the derailleur hanger in position, screw the derailleur hanger into place on the frame. This part should only be used one way, with the notch positioned towards the ebike's rear. It is essential to avoid cross-threading and not overtighten the bolts; about 2Nm is sufficient.
It is simple to install the derailleur hanger but avoid overtightening the screws.
When configuring the derailleur, make sure the wheel is aligned correctly in the dropouts. Check that the derailleur cage clears the cassette and that it operates smoothly without interference when shifting gears.
When you have a standard dropout hanger, you may now install the derailleur without any problems. If you have a direct mount derailleur hanger, you will need to remove the B-link from the derailleur if you haven't already done so before continuing. With a hex or Torx key, secure the derailleur to the derailleur hanger and tighten it to around 8-10Nm of tension. You should not have any gaps between the B-link and the notch of the derailleur hanger if you have a B-link. In certain circumstances, the b-screw must contact the derailleur hanger. Turn the derailleur a little to the left or right so that the b-screw applies some force to the notch in the derailleur hanger, as shown.
Now that the derailleur has been mounted, switch it to the setting to lessen its resistance. Not all derailleurs have this feature, but for Shimano's Shadow Plus derailleurs and SRAM derailleurs with Cage Lock, you must first engage the clutch mechanism in the off position and then engage the clutch mechanism in the locked position. Now that the back wheel has been installed, we can proceed to the following phase, which is installing the chain.
Placing the B-Link against the notch of the derailleur hanger will ensure proper alignment.
To install the chain, thread it through the derailleur and ensure it’s properly tensioned. Connect the chain ends with a quick link or chain tool, and ensure it's neither too tight nor too loose. Test the shifting before final adjustments.
I'll go through the fundamentals of chain installation before we get started. The article How to Replace a Mountain Ebike Chain has additional in-depth information on the installation and removal of chain links and the many forms of connection and chain length.
The chain that I'm using to attach the cassette is used and worn, which is consistent with the condition of the chainring and cassette. The new chain is recommended if the wear on your chainring and cassette has not yet reached its maximum capacity. A new chain on old chainrings, on the other hand, is not a good solution since it reduces performance and increases chain wear. The master link, a two-part outer chain link that makes it much simpler to install and remove the chain (and maybe reused depending on the kind of chain link you purchase), is used to join the chain links together.
By default, two links are added to the chain; however, when employing a master link, only one link is added to the chain's length.
Take the chain tool and set it above the centre of the pin, then use it to push the pin out of the chain until it is entirely out. Things take a lot of effort to get started. When the pin has been removed, remove the tool and reinstall the chain in the proper position. The chain should be wound around the chainring and cassette, passing through the rear derailleur and if you have one, the front derailleur. Pay close attention to the rear derailleur since the chain must travel in a straight line between the guide pulley and tension pulley to avoid rubbing on the tab of the derailleur cage there.
Place one section of the master link on each end of the chain and pull the two ends together to complete the chain. Ensure that the master link's two sides are aligned, and then press the two sides together. Apply stress to the chain to ensure that the master link is securely fastened. Positioning the master link between the cassette and chainring, applying the rear brake, and turning the crank will provide additional force if the link is damaged or worn.
To complete the process, you must engage the clutch mechanism of the derailleur once again. Depending on your derailleur, you may need to turn on the clutch mechanism or turn off the Cage Lock feature.
Share:
Which Commuter E-bike Is Better: HovRanger or KBO Breeze?
How to Change Your Ebike Chainrings