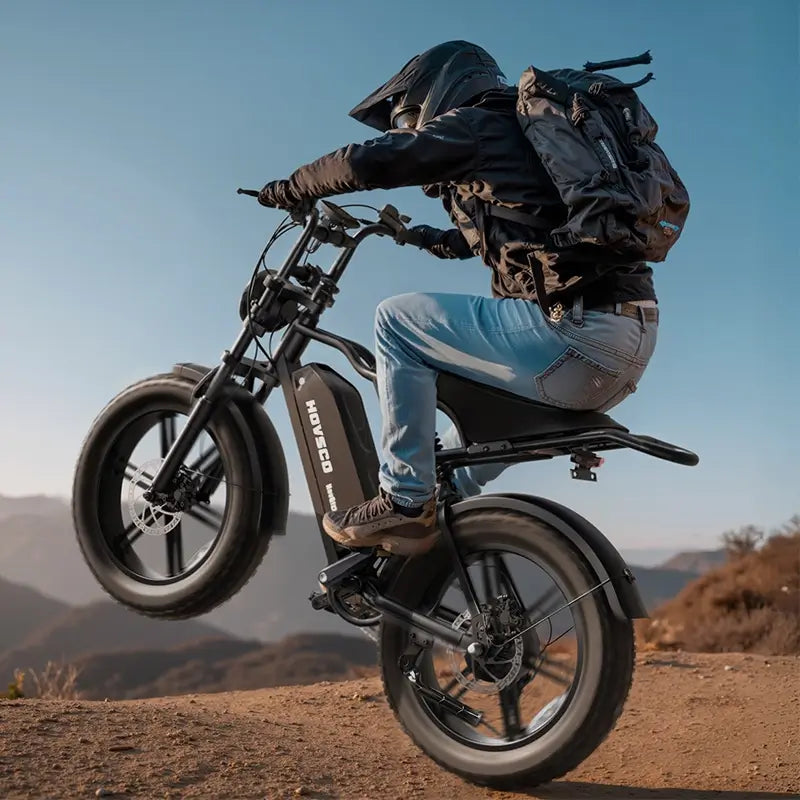
Building your own electric bike is an accessible and rewarding project that transforms a traditional bicycle into a powerful, eco-friendly ride. Using an electric bike conversion kit, you can upgrade your bike with a motor, battery, controller, and accessories, tailoring the setup to your needs. With basic mechanical skills and the right tools, DIY e-bike conversion offers customization, cost savings, and the joy of crafting your own electric mobility solution.
How Do You Choose the Right Electric Bike Conversion Kit?
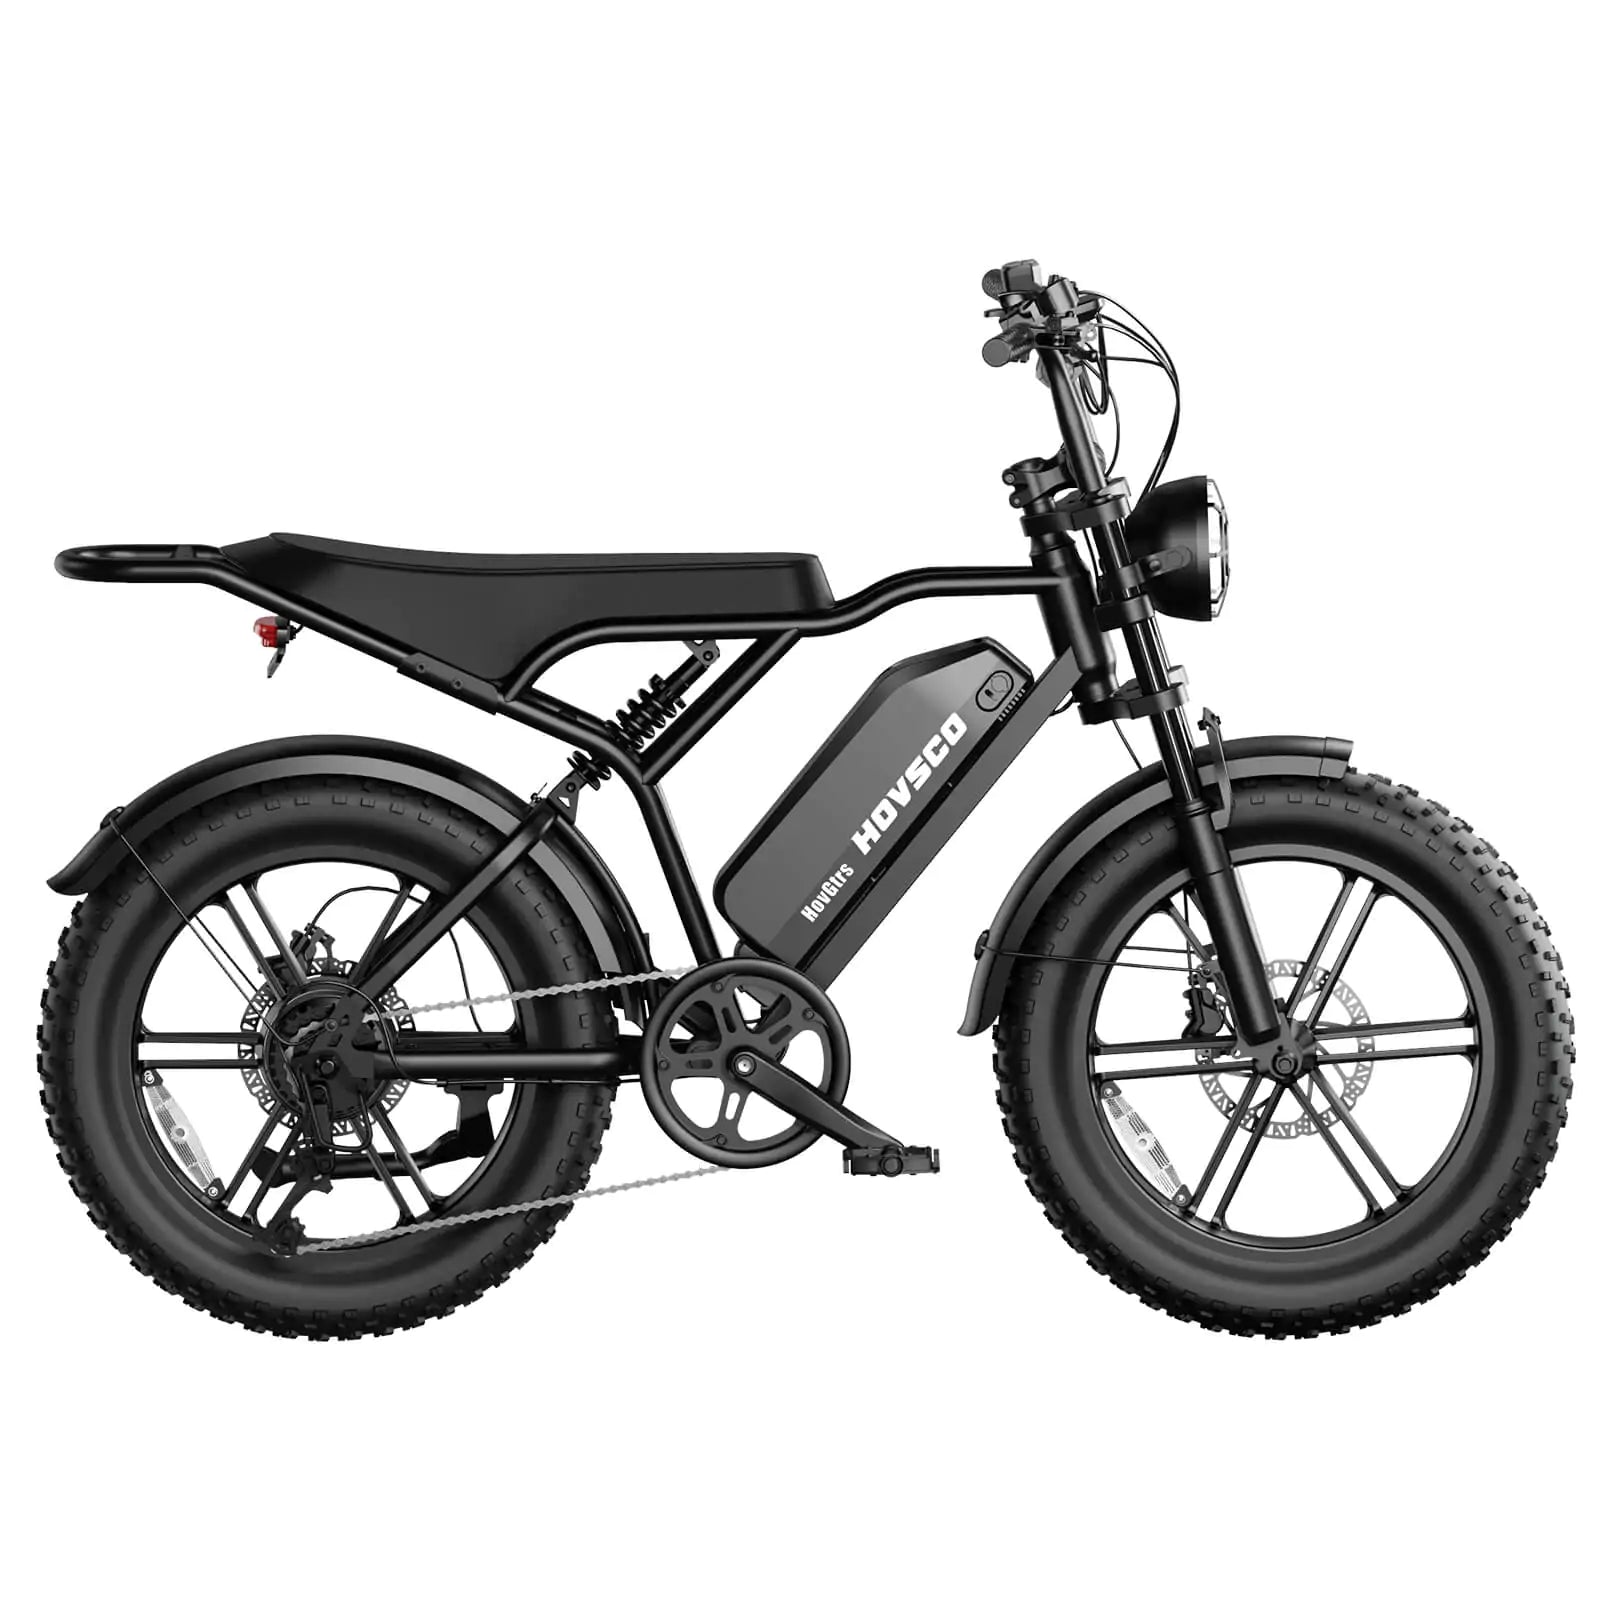
Selecting the appropriate e-bike conversion kit depends on your bicycle type, riding style, and desired performance. Kits vary by motor placement—front hub, rear hub, or mid-drive—and motor power, typically ranging from 250W to 1000W or more. Consider battery voltage and capacity for range, compatibility with your bike’s wheel size, and included accessories like displays or throttle controls. Popular kits balance ease of installation, reliability, and cost, making brands like HOVSCO a trusted choice.
What Tools and Materials Are Needed for a DIY E-Bike Conversion?
Essential tools include wrenches, screwdrivers, tire levers, wire cutters, and possibly a torque wrench. You’ll need your existing bike, the conversion kit (motorized wheel, battery, controller, wiring), and safety gear. Additional materials might include zip ties for cable management and mounting brackets for batteries or displays. Having a clean, organized workspace and access to instructional manuals or videos enhances the installation process.
How Do You Prepare Your Bike for Conversion?
Start by inspecting your bike’s frame and components to ensure they are in good condition and compatible with the kit. Remove the existing wheel where the motorized wheel will be installed, and clear any obstructions like fenders or racks. Check brake compatibility, especially if switching to disc brakes. Clean and lubricate drivetrain parts to optimize performance post-conversion.
How Is the Motor Installed on Your Bike?
Installation typically involves replacing the front or rear wheel with the motorized wheel from the kit. Ensure the axle fits securely into the bike’s dropouts, tightening nuts or quick-release levers properly. If your kit includes a freewheel or cassette, install it on the motor hub before mounting. Align the wheel to avoid brake rub and ensure smooth rotation.
Where and How Should the Battery and Controller Be Mounted?
Mount the battery on the bike frame’s downtube or rear rack using supplied brackets, ensuring it is stable and won’t shift during rides. The controller, which regulates power flow, should be placed in a protected but accessible location, such as under the battery or inside a frame bag. Secure all wiring neatly to prevent damage and interference with moving parts.
How Do You Connect and Wire the Electrical Components?
Connect the motor, battery, controller, throttle, and display using the provided wiring harnesses. Follow the kit’s wiring diagram carefully, ensuring all connectors are fully seated and secure. Use zip ties to bundle cables and avoid loose wires. Double-check polarity and connections before powering on to prevent damage.
What Accessories Should You Install for a Complete E-Bike Setup?
Install the throttle or pedal assist sensor on the handlebars for motor control. Mount the LCD display in a visible spot to monitor speed, battery level, and assist mode. Attach brake levers with integrated motor cut-off switches for safety. Consider adding lights, fenders, and racks to enhance functionality and comfort.
How Do You Test and Adjust Your Newly Converted E-Bike?
Before riding, test all electrical components in a safe area. Check motor response to throttle and pedal assist, brake functionality, and display accuracy. Adjust brake calipers if necessary and ensure the wheel is securely mounted. Take a short test ride to assess handling and motor assistance, making fine adjustments to settings or component positions as needed.
Chart: Key Steps in DIY Electric Bike Conversion
| Step |
Description |
Tools/Materials Needed |
| Choose Conversion Kit |
Select based on bike type and motor power |
Research, compatibility checks |
| Prepare Bike |
Inspect and remove necessary parts |
Wrenches, screwdrivers |
| Install Motor |
Replace wheel with motorized hub |
Tire levers, wrenches |
| Mount Battery & Controller |
Securely attach battery and controller |
Brackets, zip ties |
| Wire Components |
Connect motor, battery, throttle, display |
Wiring harness, zip ties |
| Install Accessories |
Attach throttle, display, brake sensors |
Screwdrivers, mounting tools |
| Test & Adjust |
Verify system operation and safety |
Test ride, adjustment tools |
What Are the Features of a Schwinn Tricycle?
A Schwinn tricycle features a stable three-wheel design, a comfortable upright seat, and easy step-through frame. It often includes rear storage baskets, wide tires for smooth rides, and ergonomic handlebars. Designed for adults and seniors, Schwinn tricycles provide comfort, safety, and practicality for leisure or light commuting.
How Does a Schwinn Tricycle Benefit Riders?
A Schwinn tricycle benefits riders by offering enhanced balance, stability, and comfort, especially for those with limited mobility or balance issues. It’s ideal for casual riding, running errands, or exercising safely. The added rear basket and relaxed riding position make it a convenient and enjoyable transportation option.
A Schwinn tricycle offers a unique combination of balance, stability, and comfort, making it an excellent choice for seniors, individuals with limited mobility, or anyone seeking a more relaxed cycling experience. Unlike two-wheeled bikes, its three-wheel design provides a sturdy, tip-resistant platform that builds rider confidence. The low step-through frame makes mounting and dismounting easy, while the upright riding position reduces strain on the back and joints, promoting better posture during longer rides.
Beyond stability, Schwinn tricycles are also designed for practical daily use. Many models feature a spacious rear basket, perfect for carrying groceries, bags, or picnic supplies. Riders can enjoy light exercise, run local errands, or cruise around the neighborhood with ease. With their retro-inspired styling, durable construction, and smooth handling, Schwinn tricycles offer both functionality and fun, helping riders maintain independence and an active lifestyle with added confidence and convenience.
Purchasing Advice
When buying a DIY e-bike conversion kit, prioritize compatibility with your bike’s wheel size and frame type. Choose kits with reliable motors and batteries from trusted brands like HOVSCO, which offer quality components and comprehensive support. Ensure the kit includes clear instructions or access to tutorial videos. Invest in essential tools and safety gear to facilitate smooth installation and safe riding. Consider your riding needs—commuting, trail riding, or casual use—to select appropriate motor power and battery capacity.
HOVSCO Expert Views
“HOVSCO encourages cycling enthusiasts to explore DIY e-bike conversions as a way to customize their rides and embrace sustainable transportation. Our conversion kits are designed for ease of installation, durability, and performance, empowering riders to upgrade existing bikes with confidence. We support the DIY community with detailed guides and responsive customer service to make every project a success.” — HOVSCO Technical Team
FAQ
Q: Can I convert any bike into an electric bike?
A: Most bikes with standard frames and wheel sizes can be converted, but check compatibility with your chosen kit.
Q: How long does it take to install a conversion kit?
A: Installation typically takes 2 to 4 hours, depending on experience and kit complexity.
Q: Are DIY e-bikes legal?
A: Laws vary by location; ensure your converted e-bike complies with local regulations regarding motor power and speed.
Q: What maintenance does a DIY e-bike require?
A: Regular bike maintenance plus battery care and periodic electrical system checks are recommended.
Q: Can I install a mid-drive motor myself?
A: Mid-drive kits are more complex and may require advanced mechanical skills compared to hub motor kits.
How to make an electric bike at home?
To make an electric bike at home, buy a compatible eBike conversion kit (motor, battery, controller), ensure your bike frame fits the motor type, and gather tools like wrenches and screwdrivers. Follow step-by-step installation guides to replace the wheel with the motor, install the battery, and wire the controls. HOVSCO kits provide detailed manuals to simplify DIY conversions.
What is the easiest eBike conversion kit?
The easiest kits are front hub motor systems like the Swytch Kit or basic 250W hub kits, requiring minimal mechanical skills—mainly wheel replacement and simple wiring. They avoid bottom bracket complexity found in mid-drive kits, making them ideal for beginners wanting a quick, reliable install.
How fast will a 1000W eBike kit go?
A 1000W eBike kit typically reaches speeds of 25 to 35 mph (40 to 56 km/h) depending on factors like rider weight, terrain, and bike setup. Higher wattage means more power and faster acceleration but remember to check local laws for legal speed limits.
What do I need to make an electric bike?
You need a standard bike, an eBike conversion kit (motorized wheel, battery, controller, throttle), basic tools (wrenches, screwdrivers), mounting accessories, and electrical wiring supplies. A manual or video guide helps. HOVSCO offers comprehensive kits including these components for easier home assembly.
How To Read An Ebike Conversion Kit Wiring Diagram?
Identify color-coded wires for motor phases, battery, throttle, brakes, and controller. The diagram shows connections between components to ensure proper functionality. Follow legends carefully to avoid miswiring and damaging parts.
How To Install An E-Bike Conversion Kit Step By Step?
- Remove wheel and install motorized wheel.
- Mount battery securely on frame.
- Connect throttle, brake sensors, and controller wiring as per manual.
- Test electrical connections.
- Adjust brakes and gears.
- Secure cables neatly.
How To Find E-Bike Conversion Kit Installation Near Me?
Search online marketplaces or local bike shops offering conversion services. Check eBike forums, social media groups, or community workshops. HOVSCO’s dealer network also lists trusted installers for professional assistance.
What Should You Know About A 1000W Ebike Kit?
1000W kits provide strong torque and higher speeds but may be heavier and drain batteries faster. They require a sturdy frame and good brakes. Check local regulations; some regions restrict eBikes over 750W or certain speeds.
What’s Included In An Electric Bike Conversion Kit Manual?
Manuals include parts list, wiring diagrams, installation instructions, safety notes, troubleshooting tips, and maintenance advice to guide users through proper assembly and ensure safe operation.
How To Follow Electric Bike Assembly Instructions?
Read instructions fully before starting, gather tools and parts, proceed step-by-step, cross-referencing wiring diagrams, and double-check connections. Test components progressively to avoid errors.
How To Build An Electric Bike For Under $100?
Building a full electric bike under $100 is difficult but possible by using used parts, salvaging batteries and motors, and simple kits or DIY motor hacks. Prioritize safety and test thoroughly. Brands like HOVSCO offer affordable kits with a better balance of quality and price for beginners.
If you're looking to get into the electric bike world but don't want to break the bank, DIY conversions are a great option. With a little bit of know-how and a few e-bike kits, you can build your own electric bike without breaking the bank. This guide will show you how to make your own electric bike using different e-bike kits and accessories, so you can choose the one that's right for you.
Electric bikes are growing in popularity as they offer an environmentally friendly way to get around. They're also great for commuting because they're quiet and efficient. If you're looking to get into the electric bike world but don't want to break the bank, DIY conversions are a great option. With a little bit of know-how and a few e-bike kits, you can build your own electric bike without breaking the bank. This guide will show you how to make your own electric bike using different e-bike kits and accessories, so you can choose the one that's right for you.
Step 1: Decide What Type of Electric Bike You Want
Start by choosing the e-bike style that fits your needs—commuter, mountain, or cruiser. Consider terrain, speed, and usage to determine whether you need a front, rear, or mid-drive motor. This decision guides the rest of your DIY e-bike build process.
There are many types of electric bikes on the market, from mountain bikes to folding bikes, so it can be hard to decide which one to buy. Before you make your own electric bike, you'll need to decide what type you want. There are three main types of electric bikes: mountain, commuter, and recreational. So, you can select an e-bike based on what type of riding you plan to do.
Mountain Electric Bikes are designed for off-road use and are built for speed and durability. They're usually heavier than other types of electric bikes and require more power to pedal. Commuter Electric Bikes are designed for urban use and are lighter than mountain bikes but have less speed and range. Recreational Electric Bikes are perfect for people who want a little bit of both worlds. They have the range of a commuter bike but the speed of a mountain.
Step 2: Choose the Right E-Bike Kit
Select an e-bike conversion kit compatible with your existing bike frame. Kits typically include a motor, controller, display, and necessary wiring. Ensure the motor power and battery voltage match your riding needs and legal requirements for your region.
When deciding on the right e-bike kit, it is important to take into account your specific needs and wants. There are many different types of e-bike kits available, so it can be hard to decide which one is right for you. Some of the most popular types of e-bike kits include electric mountain bikes, electric cruiser bikes, and electric folding bikes. Each type of kit has its own advantages and disadvantages. It is important to choose the right kit for your needs.
If you are new to biking, a more basic e-bike kit may be best for you. These kits usually include a battery, a motor, and a controller. These kits are easy to use and are perfect for beginners who want to learn how to bike without spending a lot of money. hovsco ebike kits are also available in a variety of different styles, so you can find one that is perfect for you.
If you want to ride a little bit faster, a more advanced e-bike kit may be best for you. These kits usually include a battery, a motor, and a controller. They are also more expensive than basic kits, but they offer increased speed and range. Some of the most popular types of advanced e-bike kits include all the accessories for all types of bikes like electric mountain bikes, electric cruiser bikes, and electric folding bikes.
Step 3: Assemble the eBike Kit Accessories
Attach the motor to the chosen wheel hub or crank area, depending on the kit type. Mount the controller and display on the handlebars. Secure wiring neatly to avoid interference during riding. Follow kit instructions closely for correct assembly.
The next thing is to assemble an e-bike kit. This can come in a variety of shapes and sizes, so it's important to find the right one for your needs. As discussed earlier, the hovsco e-bike kits and accessories are perfect for beginners. Once you have all of your supplies, it's time to assemble them together! To assemble the eBike Kit accessories, you'll first need to attach the accessories to the bike frame using bolts and screws. You may also want to buy a special bracket designed for e-bikes that helps protect the paint job on your bike. Next, connect the controller to the battery using either wires or a USB cable. You may also want to buy an extra controller in case one breaks or gets
Once you have your kit, it's time to start assembling it! You'll need to find a battery, controller, and motor. The battery will determine how powerful your bike is, while the controller will determine how much power your motor can produce. Finally, you'll need some accessories. These include a handlebar mount, a throttle control unit (TCU), and a kickstand. Each of these pieces will help make riding easier and more enjoyable.
Step 4: Add Accessories and Extras
Enhance your e-bike with accessories like LED lights, fenders, racks, or a phone mount. These extras improve functionality, safety, and convenience, especially for commuting or long rides. Choose add-ons based on your personal needs and riding style.
When you make your own e-bike, there are many accessories and extras you can add to make it unique and personal. You can choose from a variety of e-bike kits and accessories or create your own using parts and materials you already have. There are a variety of accessories available for electric bikes, including lights, helmets, seats, tires, racks, and more. Taillights provide an easy way to see when you're turning, while bike helmets protect your head in case of an accident. You can also choose seats that are specially designed for electric bikes or add a rack to carry extra items. You can also add customized lights and other features to make your bike more unique.
Step 5: Connect the Battery pack
Mount the battery securely to the frame, typically on the downtube or rear rack. Use the included brackets and straps. Ensure the battery’s voltage matches the motor and controller to avoid power mismatches or damage.
The next step is to connect your battery pack t your e-bike. The battery pack is usually the most difficult part of the entire process. Depending on your e-bike kit, it may come with all the necessary cords and connectors. If not, you'll need to find a compatible battery pack from a trusted seller like hovsco ebike. Now, you should make sure to connect it in the correct way.
There are several different ways to connect your battery pack to your e-bike. Some kits come with clamps or connectors that fit onto the frame of your bike. Others include connectors that attach to the front or rear wheel hub. Once you've connected your battery pack, make sure it's fully charged before riding.
Step 6: Connect the Wiring and Charging Components When You make Your own Electric Bike
Connect all wiring between the motor, controller, battery, throttle, and display. Double-check connections for tightness and proper alignment. Use waterproof connectors if possible. Once wired, test the charging system to ensure safe and efficient battery recharging.
The next step is to connect the wiring and charging components when you make your own ebike. For this purpose, you will need to connect the wiring and charging components in an accurate way. The wiring will connect the battery to the motor, and the charging components will allow you to charge the battery.
You will need to connect a power supply to the battery and a motor controller to the power supply. You can find these components at most hardware stores or online. But hovsco ebike is the best place to buy it. Once you have connected these components, you can start riding your electric bike!
Step 7: Ride Your Bike!
After verifying all components are securely installed and functioning, take your e-bike for a test ride. Start at a low speed to ensure everything works correctly. Enjoy the smooth, powered ride of your newly built DIY electric bike!
When you're ready to start riding your electric bike, it's important to follow the safety guidelines set out by the manufacturer. Make sure that your bike is properly adjusted and that you're wearing a helmet and appropriate clothing. Once you're comfortable riding, it's time to hit the streets. Follow the directions that came with your e-bike kit, and be sure to take advantage of all of its features. Electric bikes are great for getting around town, but they're not just for kids. Anyone can enjoy the benefits of an e-bike, no matter their age or fitness level.
Final Thoughts:
Making your own electric bike is a great way to save money and make your own vehicle. There are many e-bike kits and accessories available, so finding the right one for you is easy. You can find kits that come with everything you need, or you can find specialty e-bike components and tools to make the process even easier. Once you have your bike assembled, enjoy the freedom and convenience of riding it wherever you want.
If you're interested in building your own electric bike, Hovsco is the best place to buy an ebike and its accessories. We have a wide selection of ebike kits and accessories, so you can get the perfect e-bike setup for your requirements and needs. Moreover, our knowledgeable and experienced staff is available to help or guide you choose the right kit for your build. Whether you're starting from scratch or just looking for an upgrade, Hovsco has everything you need to get started.


Share:
What You Need to Know About E-Bike Batteries in 2025
2 vs. 3 Wheeled Cargo Bikes: Which is The Best?